Things I like – Bitvise Tunnelier
Folks who run their websites on dedicated servers are familiar with SSH as a way to securely connect to their server from any location. A less well-known aspect of SSH is built-in support for tunneling – which can be simply explained as “built-in proxy server”. As the article I’ve linked to in the previous sentence succintly puts it tunneling “is a way to forward otherwise insecure TCP traffic through SSH”.
If you have ever been nervous about using public Wi-Fi for anything other than checking the news, you should definitely look at SSH tunneling. I use SSH tunneling to access websites that run on high port numbers (CPanel, HyperVM etc.) through my corporate firewall that only permits basic HTTP traffic otherwise.
On the Windows side, PuTTy is the most popular SSH client – being freeware and extremely light on memory and disk space are huge pluses. That said, I’ve found PuTTy to be rather lacking in tunneling support – 1) the application tends to buckle under several simultaneous connections and 2) it lacks any sort of built reconnection support, which is a basic requirement for proxying.
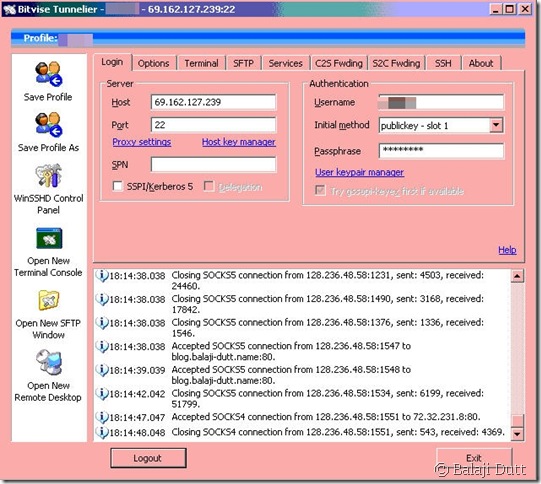
A little bit of searching around lead me to BitVise Tunnelier – a free for personal use SSH client that offers superb tunneling support. It also has a couple of other nifty touches that I like, but let me start off with the basic login window:
This is the second clue that tunneling is a big part of this program (the name being the first clue 😉 ) – a log window of all active connections and traffic going through the application. Most of the other features in this window are available in PuTTy as well, but it’s definitely presented in a more accessible way in Tunnelier.
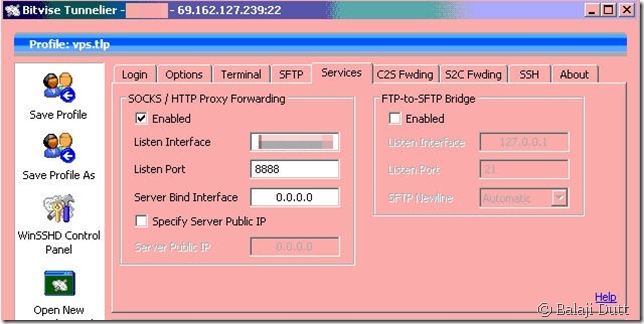
Let’s take a look at how to setup proxying in Tunnelier:
Ah, this is so much better than PuTTy’s cryptic “dynamic” port setting. Not much else to talk about here, so let’s move onto Tunnelier’s screen for setting up port-forwarding.
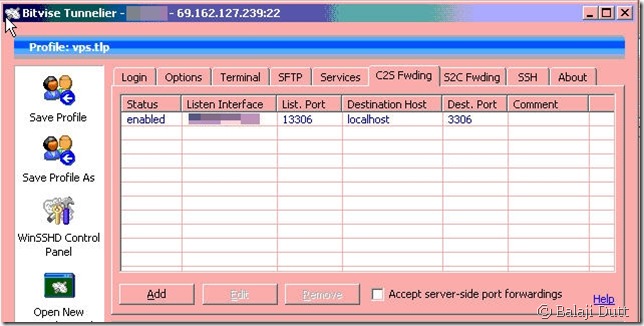
Before we get there, it’s worth noting that port-forwarding really is some technological black-magic and most explanations have left me pretty confused, so here’s my stab at clearing up what Port Forwarding is – through SSH magic, Port Forwarding allows you to connect to a port on a machine in your network and have that connection automatically relayed to a different server on another network that you would not be able to reach otherwise. I hope that helps 🙂 , because that might help explain this screen a little better:
In my mind, this is probably the worst UI screen in Tunnelier – it wasn’t really till I understood how port-forwarding worked that I actually wrapped my head around this screen. I do wonder if maybe a wizard might have helped here.
As it stands, the screen asks you to define the port on the machine hosting Tunnelier that should be “forwarded” to the remote server and once it’s at the remote server, which port the traffic should be sent to. (( I know it’s a bit odd to see localhost as the destination but that’s because I’m trying to connect to a service on the remote server that only listens on the remote localhost address – hopefully that makes sense ))
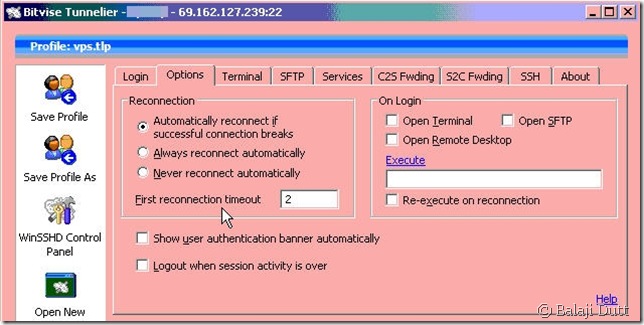
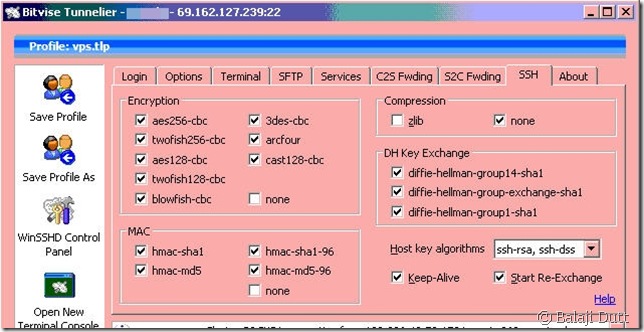
To wrap-up this show-and-tell session, let’s look at the SSH/options window:
Just to point out that Tunnelier offers not one, but two different settings to ensure proxying doesn’t break – an automatic reconnect option and a Keep-Alive option.
Final Notes and Caveats:
- I haven’t used Tunnelier’s built-in SSH client, but for pure command-line work, PuTTy is my preference. (( And if you do use PuTTy, you should check out this article on colour schemes – the “Zenburn” scheme is my favourite ))
- Tunnelier also offers some very robust SFTP support – I haven’t used it myself, but my colleagues do and have only good things to say about it.
- Astonishingly for a free product, Bitvise still offers great support for Tunnelier – just post in their support forum and you should get a reply from the developers within a day or so.
- Some Network admins may not take kindly to your routing any traffic through this tunnel, essentially “hiding” your traffic from network devices. Check with your admins before doing this on an corporate network!
- Yes, certain parts of the screenshots have been blurred out – I’m paranoid that way 🙂
- Apologies for the horrible colour on the screengrabs – my Tunnelier instance is on a remote server, which is only accessible through a slow VNC connection.
